Showing posts with label Photography. Show all posts

Thursday, September 28, 2017

SWANK September Round #4 - Luxe Dot-Be Fashion - Artus

The result of the collaboration between Luxe and Dot-be at the SWANK September Round is this smart outfit. Consisting of a blazer and shirt and a pair of pants. The set is called Artus.
It is available for the Adam, Gianni, TMP, Slink, Belleza mesh body and the standard avi body.
Blazer can be added alone without the shirt, and as really neat feature the shirt comes as a tucked-in.
Necklace and bracelet is the Dansei Set Noir from Heartsdale Jewellery


Style Card


Outfit

Accessories

Pose


SWANK September Round #3 - K-tarsis - Samurai 02 Tattoo

This amazing tattoo is available at the SWANK September Round. Made by the designers behind
K-tarsis Design . This tattoo is HUD controlled, 2 colored and 2 monochrome, each with 2 different intensities. Available for Belleza, Maitreya, Omega, Signature and Slink bodies.
There is also a female version of the Tattoo.


Style Card


Tattoo

Pose

Wednesday, September 27, 2017

SWANK September Round #2 - Amazing Creations - Black Dragon Shirt and Jeans


Amazing Creations at the SWANK September Round has this time created this shirt in two colors, white and black, both with different prints. The shirts are of course mesh and comes for all the popular mesh bodies such as Adam, Aesthetic, Slink, Gianni, Belleza and TMP. 5 standardsizes are also included. The cool part is that the comes tucked in or loose. The white shirt has two different prints, the black has four. Great options for an Asian look.
With the jeans you have the option of changing the color of the belt and belt buckle. Also included is a color change hud.


Style Card


Outfit

Tuesday, September 19, 2017

SWANK September Round #1 - JZ - Logan Jacket

Designer Dolome Demonia from JZ for Men, has created this amazing jacket called Logan for the SWANK September Round. With the matching pants, and her Urban Stomps, you get a really cool look that can only inspire you.

The Jacket and pants are mesh of course, and comes in 5 sizes. The pants comes in two variants, skinny and Cut. The boots can be resized with a HUD.

The Gaga Drip Mask in black is borrowed from an outfit from designer ::ALTER:: is showcasing at the SWANK Event as well.

The necklace is the from the Dansai set made by Heartsdale Jewellery - also available at the SWANK event this month.


Style Card


Outfit

Accessories


Pose

Friday, June 23, 2017

SWANK June Round #3 - CH Raul Shirt

CH has a few different outfits available at the SWANK June Round Event. This one is the Raul shirt.
A comfy long sleeved polo shirt with a great fabric texture. The folds and wrinkles are in the right places. It should be your favorite shirt. This shirt comes with a HUD where you can choose from 12 different colors. The shirt is also delivered ready for all the major Mesh bodies including Belleza and Gianni. 5 sizes from XS to XL for standard bodies are also in the box, so you should be able to find one that fits you perfectly ;)


Style Card

Outfit


Pose

Sunday, August 28, 2016

Chilling

SWANK August round is coming to a close on August 31st. So there is still time for some last minute shopping, such as the Alec outfit from Ghostyss. After the event you can head on over to the Ghostyss main store to pick up the outfit which consists of a pair of jeans and a very nice textured shirt with Tie and Waistcoat. It comes in 5 different mesh sizes with alpha of course.

The incredible detailed Chaise Elegante PG is from OTB! includes several poses, is also on sale at SWANK.

The image below was published in ENVY Magazine 3.0


Style Cards:

Hair
  • Dura ~ Boy*61 - Black
Head

Body

Skin

Shoes

Props


Wednesday, July 20, 2016

Head over heels

Its been very quiet here on the Nobody's Bizz blog.  I have had the pleasure of being a part of the ENVY Magazine team for quite awhile now as Editor in Chief. My passion, however, is still photography, and while my new position at ENVY is exciting and challenging, it leaves me with very little time to actually shoot for my blog or just for fun.

The title of this blog says it perfectly how I feel about  Debbie. I really missed my best friend, and girl friend while she was on vacation in June. I'm sure you noticed her absence if you are a regular reader of her blog. When she came back, we immediately started to talk about shoots and blogs we could do together because its something we both love to do. But we also talked about poses. Poses we could make our selves using AnyPose. You will see Debbie and I create these and use them more and more. 


In the scene below, shot by Debbie, I'm wearing the Beach T-shirt from Luxe Paris, btw the the shirt and shorts are currently available at the SWANK July Round which has just a little more than a week left to go. And while you're there, grab the free gift as well. 
The two part sweater has very nice knitted textures over the long sleeved t-shirt and is comfy and perfect on those chilly summer nights at the water. It comes in standard mesh sizes S-M-L but also a couple of Fitmesh versions, and for the Slink and TMP bodies, so it should be possible to find one that fits you.


The shorts  are also a perfect fit for my Slink body. For this item you get 5 standard mesh sizes from XS to XL and is compatible with Slink and TMP

Photo by Debbie Jasper

Style Cards:

Hair
  • Dura ~ Boy*65 - Black
Head

Body

Skin

Pose

  • Agapee ~ Couple Poses 09 - New Release

Check out Debbie's blog for her style card here


Sunday, March 27, 2016

Run, Baby, Run

Sheryl Crow is one of my all time favorite singers. Amazing, timeless lyrics and music that never gets old to listen to. While editing this image I was listening to one of her old albums (Tuesday Night Music Club) and her song Run, Baby, Run just made me pause and listen, so it became the title of this post. There's a youtube link to her song below.

This week new release from Serendipity is the Tyler leather mesh pants series. They come in 6 different colors, beige, grey, navy, red, white and black - which is featured below, and each them comes of course in 5 mesh sizes ranging from XS to XL.

Debbie Jasper did an amazing job creating the pose for this post ;) Thank you ♥


Style card:


Outfit:

Body:

Skin (head only):

Hair:

Jewelry:

  • Gabriel - Angel wings Necklace (male) / silver

Pose:

The blog post can also be found on http://debbiejasper16.blogspot.sg/

Monday, March 14, 2016

Wooof..

This weeks Fifty5 Thursday item from Glint is this nice and cool celtic necklace made of a couple of leather strings with silver and black beads on both sides of the celtic ax and the wolf. Very cool and rugged looking.

Woof...


Style card:


Jewelry:


Outfit:


Wednesday, February 24, 2016

You can leave your hat on

Across the street from Glint Jewelry is a clothing store - Serendipity, which I have the pleasure of featuring this weeks outfit for.

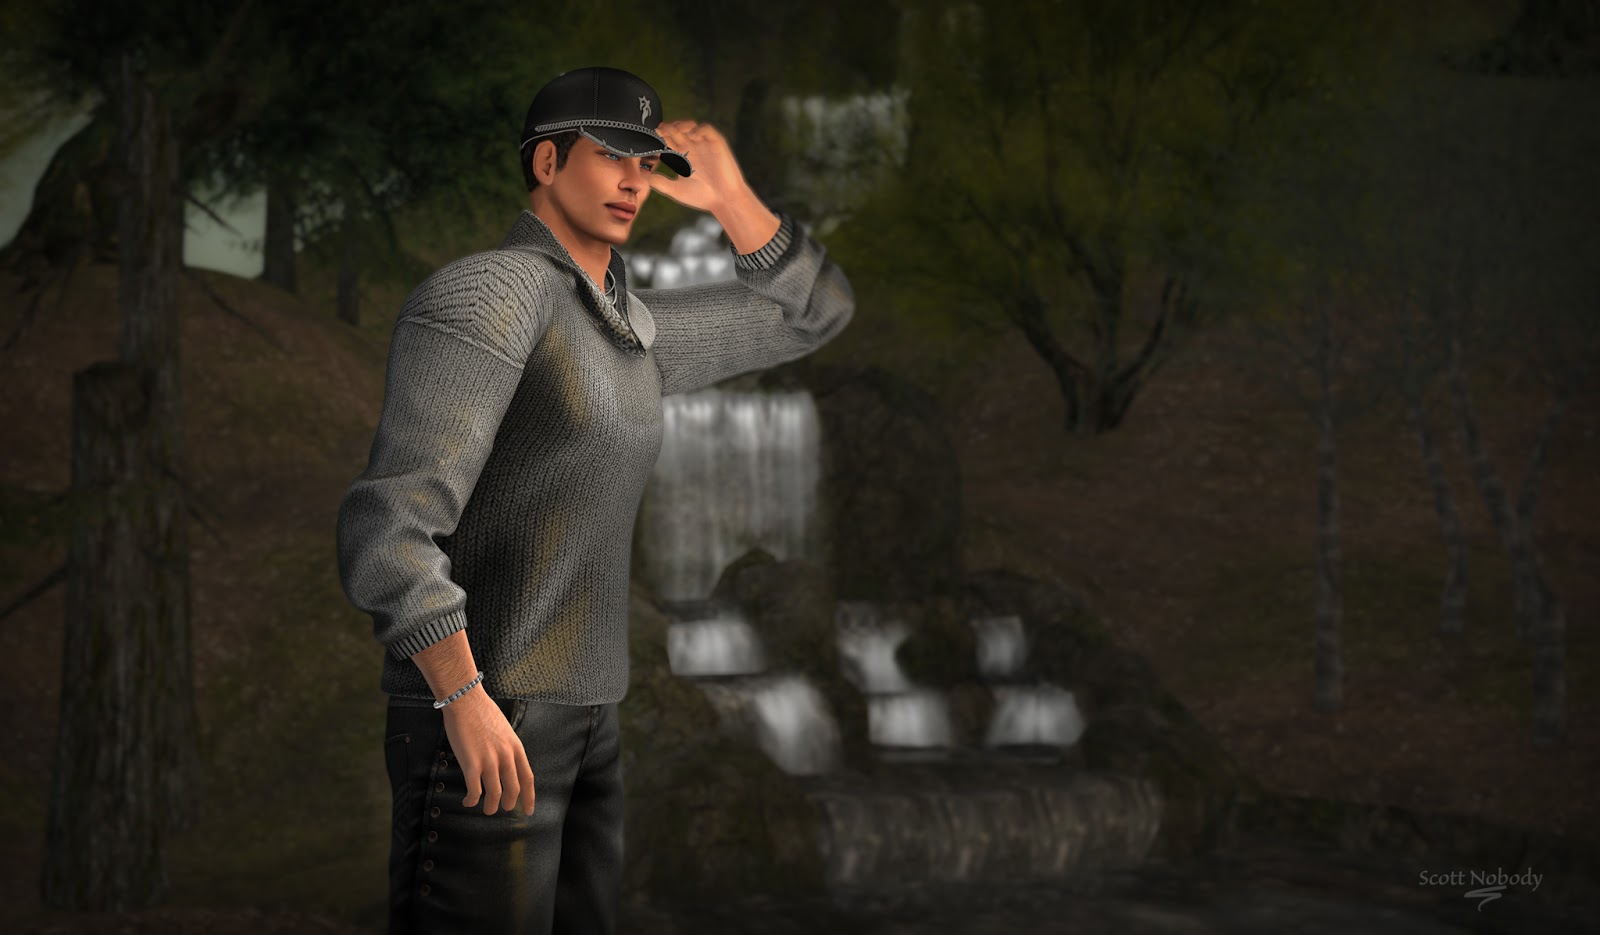
Starting at the top, the ball cap is HUD controlled with five different colors and two types of metal silver and gold. A really convenient re-sizer is also in the HUD. Great idea!


The sweater and pants is also HUD controlled, 11 colors for the sweater and 10 different colors for the pants and pockets.

 This weeks L$55 item from Glint Jewelry is this very nice Leather Skull bracelet. Looking up close it has really nice leather textures. A great find.


Style card:


Outfit:

Jewelry:


The blog post can also be found on http://debbiejasper16.blogspot.sg/


Tuesday, February 16, 2016

She's mine


Another really nice treasure from Glint Jewelry & Accessories is this customize-able block letter bracelet for both him and her. When you purchase this bracelet, all you have to do is to fill out the accompanying note-card and return it to Rainbow. She will very quickly personalize your bracelet and sent it back to you. I believe a total of 6 letters of your choice is maximum on each bracelet. The bracelet is easily adjustable via a script dialog box, and making sure it sits right on your wrist is of course done via the edit menu.

The outfit I'm sporting on this beautiful morning is from FashionNatic on the markedplace (link below). It's completely HUD controlled for pants, shirt and tie. 35 colors and textures for the shirt and the tie, 8 colors for the pants. There is an option for hiding the tie if you choose to do so.

Finally, a great pair of shoes from L&B, (link below). They are the WingTip Fatpack option, also complete HUD operated with several color combinations.

Click image for lager size


Style card:


Jewelry:


Outfit:

  • FashionNatic - Vidor - Shirt Mesh
  • FashionNatic - Vidor - Pants Mesh
    • FashionNatic is only on the Second Life Markedplace.

Shoes:

  • L&B - Dress shoe WingTip Fatpack


The blog post can also be found on http://debbiejasper16.blogspot.sg/


Monday, February 8, 2016

MensStuff Hunt - Glint Jewelry & Accessories

Being notoriously bad at hunts, I did somehow manage to find the MensStuff Hunt treasure at .:Glint:. Jewelry & Accesories the other day.

The gift contains 2 leather bracelets, one wide made of several leather knotted strings with diamond print beads, and one single string of leather with metal rings and metal beads. The single strand bracelet is easily scale-able via a HUD - just click on the bracelet, whereas the wider bracelet can be scaled via the edit menu. Both of them are a great additions to the casual guy.


Style card:


Jewelry:


Jeans:

  • Redgrave - Jeans HeavyUsed - Classic Cut Mesh

Shirt

  • Luke Tucked in White T-shirt.

Shoes:

  • Ryder Boots - Navarro Ankle


The blog post can also be found on http://debbiejasper16.blogspot.sg/


Sunday, January 10, 2016

Photography tips #3 - Derender

In real life photography, a little pre-photoshopping on location is time saved when editing, and by that I mean removing things (if possible of course) that has to be fixed in post editing anyway. So before the shot is actually taken, remove or fix things such as an odd twig, toys in the background, garbage, or stray hair on the model etc. Basically try and get rid of anything that doesn't belong in the final picture. You'll thank your self later if you do.

Until just recently, I thought that was more or less impossible in SL without having editing rights, but a shooting sessions with Debbie Jasper over the holidays taught me something very cool. I might be the noob here for not knowing this clever little trick, but I'm okay with that :) I'm always willing to learn and share.

The session we were on was shot over the Christmas holidays. We were shooting a gown Debbie was blogging, and the problem was there were Christmas decorations and other items that just didn't fit the theme of the gown. After have shot from a few different angles I just couldn't get a shot I liked because of the items on location. Then Debbie said - "Just de-render temporarily".  /Me: "Huh?" So she showed me, and low and behold, life just got a little bit easier.

I found some of the raw photo's from that first session. In this shot, the cat on the piano and the lamp at the end of the stage is bugging me. But to clone those items out in Photoshop looks like a lot of work so kept looking for angles where these items weren't visible, but that of course changed the look and view of the gown.


After Debbie's little revelation we went back the next day. Below is another raw shot from the second session. The cat and the lamp has been de-rendered temporarily making the post editing a lot easier. 


Here's how do this in Firestorm: 
  • Right click on the item that is in your frame, or picture that you want to remove. 
  • Click MORE in the circle - twice
  • Click DERENDER 
  • Finally click TEMPORARY
And the item such as a pose-ball, tip jar or perhaps a person in the back ground is gone. You have a much cleaner raw photo to work with in Photoshop.

Thank you Debbie :)

One thing to keep in mind when doing this, is to be very careful what you click on. I lost the floor the first time I tried but a quick relog fixed it, and I could start over with de-rendering unwanted items again. 

Here's a link to the gown Debbie blogged.

This blog post was also posted on http://debbiejasper16.blogspot.sg

Saturday, January 2, 2016

Photography tips #2 - Watch your background.

This time we'll take a look at another simple way of making your Second Life photos turn out better. In photography, the background is or can be just as important as the subject. Especially when the background is interfering with the subject in a way that is unintentional.

Its a simple tip really. Lets call it the "Keep the head in a clean spot" tip. What I mean by that is, when you shoot your self or another person, try and keep the background behind the subjects head clean so nothing appears to be growing out of, sticking in to, or going through their head. A good example could be tree branches that mysteriously protrude from the subjects head, or a lamppost sticking out of the top of the head.
Here the trunk of the tree is growing out of my head.
It is fairly easy to avoid this situation. A simple change of camera angle, or perhaps make the subject take a few steps to one or the other side will save a lot of work later in Photoshop.

Even though the back ground is messy, it is uniform behind the head, and the background is also been blurred by using the DoF feature in Firestorms Phototools
If it is impossible to keep a separation between the subject and the background, turning on the depth of field option in SL will help making the final image more pleasing to the eye.The trick here is that the eye will seek out sharp details before blurry details, and because of that we have a seperation between the back ground and the subject.. Still, moving the camera slightly will eliminate the unfortunate tree growing out of the head completely.

Even with DoF enabled, the tree trunk is still where is shouldn't be, however a better version that with the DoF disabled.


Again, tree in a position where  they shouldn't be any.

A slight move with the camera and the head it is clear, however we have another problem  - horizon lines going through the head.
 Another scenario to keep an eye out for is horizon lines going through the head of a subject, as in the line between the sky and the ocean for example. A slight move with the camera and the problem is gone.


Horizon lines through the head are almost as bed as trees and lamp posts.
Camera is re-positioned for a better end result.

This post was also posted on http://debbiejasper16.blogspot.sg/


Saturday, December 26, 2015

Photography tips #1 - Rule of thirds

Second Life photography is so much fun, and lots of people do it. Here is a way of taking real life photography tips and bringing it into Second Life.

One of the most simple ways of improving your images is to use the "rule of thirds". When you shoot a picture in SL, typically the object ends up dead center of the shot if you don't move your camera. That is not necessarily the best spot for an interesting image. Watch any movie, magazine, billboard, even the news on TV. Pretty much everywhere, this rule is applied in some form or another.

The rule of third grid looks like this:


When you're framing your shot, imagine four lines that is about 1/3 of the entire length or height in from either edge. Where those lines intersect, you have a focal point (red circle). A point where the eye almost automatically goes to right away when we look at an image. You can use this to your advantage and position your object, in one of those intersections. It can be in anyone of the four intersections, just pick one that looks good to you.
Fun fact: Most people will look at the top left intersection first, then the bottom left, then the top right and so on. You will quickly find out using this method, your images will look more pleasing to the eye.


The lines are also very helpful. In landscape shots for example, you want to the horizon line to run along one of the two horizontal lines in the grid - a third from either the top or the bottom.
The vertical lines can be used to line up a tall structure or a person in just the right spot.


Not the optimal position of the subject, even though the horizon is located along the right line.
If you know you are going to be editing the image in Photoshop or Gimp later, try to make sure to leave extra room for a crop if that's is your intentions. With the crop tool in Photoshop or Gimp you can easy put the object in the desired spot, however, having not done that at the time of shooting, you will now have eliminated a lot of good pixels. Something to think about :)

Last but not least,  - this is a more a guide than a rule. - Rules are there to be broken, and very often you will get an interesting result by doing just that. An example on that could be a shot where the back ground is 100% symmetric or perhaps there is a perfect reflection. But more often than not, using this guide, or rule, will give you a better image, and should result in more favs on Flickr.


Bonus tip: Both Gimp and Photoshop has the rule of third as a guide preset already built in. Here's how you turn them on when you're using the crop tool.

Photoshop:

Select the crop tool, (C) - in the tool bar, click the mesh looking icon, and select the Rule of Third grid. Now drag from corner to corner to select the entire image. As soon as you let go of your mouse the grid will pop up and you can now adjust the handles on each side of the cropping window to place the image the way you like it.


Gimp:

Click the pen cutter like tool....?! (Shift+C) to select the crop tool. In the drop down list, chose Rule of Thirds guides. Now drag over the entire image and your grid will be drawn out. Now you can adjust the crop by using the handles in each corner to get the composition right.